
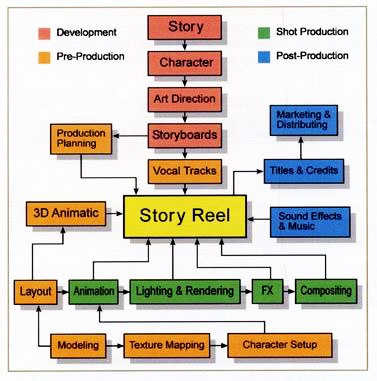
Any AR or VR project involves the initial process of 3D asset creation. There are 11 most common steps involved in producing a remarkable 3D asset creation.
They are namely:
- Concept and Storyboards
- 3D Modelling
- Texturing
- Rigging
- Animation
- Lighting
- Camera Setting
- Rendering
- Compositing and Special VFX
- Music and Foley
- Editing and Final Output
Let’s talk about them in detail.
Step 1 | Concept and Storyboards
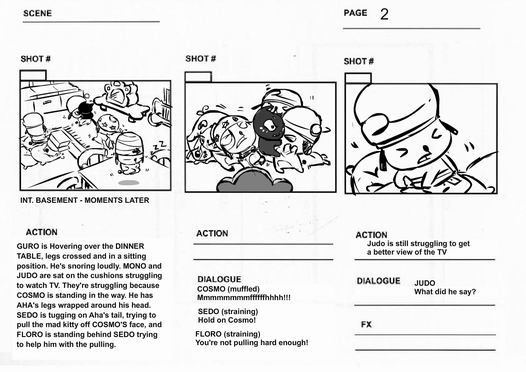
The very first step involved in a 3D production pipeline is the conceptualization of ideas and the creation of the storyboards that translate these ideas into visual form. A storyboard is a sequence of illustrations that showcase your digital story in two dimensions. The first dimension is time: what happens first, next, and last. The second is of interaction: how does the voice-over (your story) interact with the images, how do visual transitions and effects help tie together the images, how does the voice overs interact with the musical soundtrack? Any element can interact with any other one, and the storyboard is the place to plan out the impact you intend to make on the audience.
Step 2 | 3D Modelling
3D Modelling is not drawing!
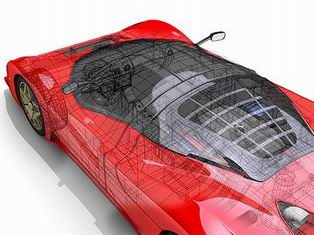
After the storyboards are finished and approved by the client, the task of building the props, environment and characters begin. The proper term is called ‘modelling’.
Modelling is the process of taking a shape and moulding it into a completed 3D mesh. The most typical means of creating a 3D model is to take a simple object, called a primitive, and extend or “grow” it into a shape that can be refined and detailed. Primitives can be anything from a single point (called a vertex), a two-dimensional line (an edge), a curve (a spline), to three-dimensional objects (faces or polygons). Using the specific features of your chosen 3D software, each one of these primitives can be manipulated to produce an object. When you create a model in 3D, you’ll usually learn one method to create your model, and go back to it time and again when you need to create new models. There are three basic methods you can use to create a 3D model, and 3D artists should understand how to create a model using each technique.
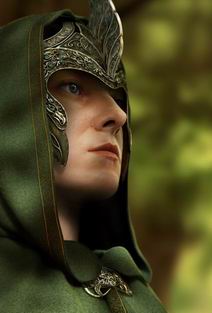
Step 3 | Texturing
The art of giving clothes to the 3D models.
When a 3D model is created, 2D images can be overlaid on it to add colors, designs, and textures. This is called mapping, and often the entirety of a model’s color comes from this. These maps can be created in programs like Photoshop, and the illusions of textures can be brushed onto the models as easily as if you painted them yourself; some animators even use real photographs of the textures they’re trying to create, simply captured and then altered to make seamless repeatable patterns. This is how many illusions of hair are created; rather than model individual strands, instead of grouped locks of hair are modeled, before a texture is overlaid with individual strands and details painted on.
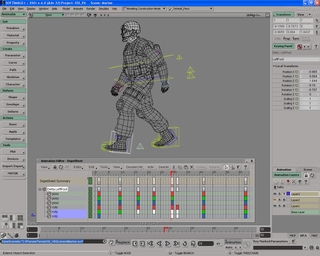
Step 4 | Rigging and Skinning
We’ve gotta put in those skeletons into a 3D character before he can move!
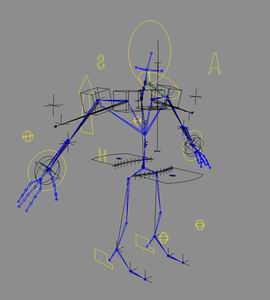
Setting up a character to walk and talk is the last stage before the process of character animation can begin. This stage is called ‘rigging and skinning’ and is the underlying system that drives the movement of a character to bring it to life.
Rigging is the process to set up a controllable skeleton for the character that is intended for animation. Depending on the subject matter, every rig is unique and so is the corresponding set of controls.
Skinning is the process of attaching the 3D model (skin) to the rigged skeleton so that the 3D model can be manipulated by the controls of the rig.
Step 5 | Animation
Now you know animation doesn’t always come first in 3D animation huh?
Animation is the process of taking a 3D object and getting it to move. Animation comes in a few different flavors. There’s keyframe animation, where the animator manipulates the objects on a frame-by-frame basis, similar to old hand-drawn cartoons. Other methods of animation include placing objects on splines and setting them to follow the path of the curve, or importing motion capture data and applying it to a character rig. Yet another way to animate is to use your 3D application’s built-in physics engines, such as when your scene requires that objects fall.
Step 6 | Lighting
Lighting in a 3D world is just as essential as it is in real life.

Lighting, (in combination with textures, camera angle etc.) is where a scene has the potential to come alive. Used improperly, light can wash out a scene, make objects appear hard or flat, and destroy all the hard work. But skillfully applied, lighting can make a scene convincing, or if realism is the aim, create (in combination with materials and geometry), a scene that is virtually indistinguishable from real life.
In 3D, lights don’t actually exist as they do in the real world. Lights in 3D are objects that are designed to simulate how lighting works in real life, but in order to obtain the results you’re after, you have to apply a number of settings, not only to the lights, but to the materials.
Step 7 | Camera Angles and Techniques
Good camera angles and techniques make the difference between good cinematography and bad ones.

A camera is an amazing tool. In 3D, unlike the real world, physical limitations don’t exist. You can create a scene where the camera takes you on a journey inside the blood vessels of a human body, or to be an eye-in-the-sky in your scenes, it can be used to create impossible perspectives, to zoom and pan and so much more. It’s beyond the scope of this article to tell you everything about cameras, but here are some basics to get you started.
First, it’s useful to look at some of the differences between 3D cameras and real-life cameras. In 3D, unlike in real life, there is no need for a lens, focusing controls, film, aperture, etc. All of these functions are controlled via software. Where things are similar is how the camera is used. In 3D, you can create one or more cameras, position them exactly as desired in 3D space and use settings to mimic focal length, depth of field, etc. Other options for moving a 3D camera are similar to those in movie making, including truck, dolly, motion blur, orbit and pan.
In addition, software cameras have no size or weight restrictions. You can move a camera to any location and even inside the tiniest objects. You can also animate cameras so that several operations take place at once, such as a zooming into a scene while changing the depth of field. Once you create a camera in 3D, you can pick a view and assign the view in that view to the camera, meaning that you will see the scene from the perspective of the camera.
Step 8 | Rendering
This is where the graphics get ‘made’ and exported…but it’s not the end yet!!!
Rendering an image is typically the last step in the 3D production pipeline (but not the last step in the overall production pipeline), and is perhaps the most important part. It is a step often overlooked or glossed over by beginners, who are more focused on creating models and animating them. There are many aspects to creating a good final render of a scene, including attention to camera placement, lighting choices which may affect mood and shadows, reflections and transparency, and the handling of special effects, like fluids or gasses.
Step 9 | Compositing and Special FX
The renders are brought into compositing programs to edit, touch-up and add on special effects
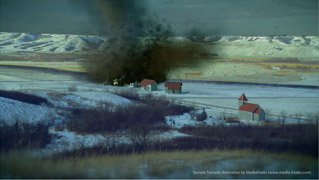
This is where the final renders are brought into compositing programs to edit, touch-up and add on special effects.
Compositing includes everything from what you probably normally think of as special effects, where things explode, evaporate, morph, etc. It also includes stage extensions (making the scene stage larger digitally in post-production), to environment creation (anything from buildings to complete worlds), to blue/green screen replacement (shooting in-front of a blue or green screen and then replacing the background with digitally created footage or footage shot elsewhere). Basically, the art of taking live footage and blending it with computer-generated footage would be considered compositing.
Step 10 | Music and Foley
Music and foley (sound effects) are added to give the animation the extra depth and boost in audio enjoyment.

A music composer will create music soundtracks and accompaniment music to set the mood for the animation.
A foley artist ‘recreates’ sound effects for film, television and radio productions. Using many different kinds of shoes and lots of props – car fenders, plates, glasses, chairs, and just about anything I find at the side of the road – the Foley Artist can replace original sound completely or augment existing sounds to create a richer track.
Step 11 | Editing and Final Output
This is where it ends!

This is where it all ends! This is where the composited renders, music and foley are compiled and edited to ensure that everything is in synchronization. Once satisfied, the compiled product is exported as one of the many formats suitable for broadcasting standards and delivered to the client!